Projects

let's make something.

Pattern/Training Montage (old-school)

Gonna need a Montage...

From Team America

The Job:
Make a montage. There are many definitions/subsets of “montage,” but the one that we’ll use is “a series of very short shots edited into a 2 – 4 minute sequence to condense space (at least 3 locations), time (ostensibly at least 4 days), and information.”

You’re not necessarily telling a whole story, just making a sequence that shows the passage of time, often with “a little improvement,” as Team America has it, or more generally, just “change.” Something needs to be very different at the end than it was at the beginning.

It may help to imagine the story in which this montage fits, but the only part you need to make is the montage itself. Unless you just have to, use no diegetic sound — unify the whole thing with one piece of music, so you don’t have to deal with editing/syncing audio.   If you want, give it narration a la Hot Fuzz storytelling, but this is not necessary.


Have a least one shot you are proud of technically, maybe a tracking shot, or a rack focus, or an aerial shot, or a match cut, etc. Montages are almost all quick cuts, 30+ per minute, so there should be very few long takes. Try to mix up the shots – close-up, medium, long, etc. Note: although maybe 20 seconds can be time lapse / stop motion, the bulk of your piece needs to be a traditional montage.


Random Ideas:
have a twist — set up the idea and then surprise us; do an homage — even copy something shot for shot; use your song as inspiration (c.f., almost any music video); think of your shots as video-only — all audio is the soundtrack; use a film convention (or 2 or 2) as inspiration; get better at cooking; learn how to make something; get better at feeding a baby; get a dog to do a trick; learn how to parallel park; conversely, work at something really hard and fail at it, either comically or tragically…

A Note:
Mostly what I've described here is American Montage.
A lot of our "Moodpiece" and "Exquisite Corpse" edits have come in the form of Soviet Montage to give an impression rather than a narrative.  That's not the goal here.

Planning & Shooting
:
Plan shots meticulously before you shoot. If you consider the students films we’ve watched so far, you can most likely see the clear outcomes that came from deliberate decision-making and planning. Background distractions, continuity errors, shots that don’t cut together- all hallmarks of unplanned, amateur and low-quality films.
In order to create a precise film, you must plan..

Production Requirements

  • a useful and varied mix of shots – establishing, medium, close-up; static, moving; low angle, high angle;
  • Established patterns of repetition throughout the montage
  • at least three “cut on action,” sequences 
    (3continuity moments between angles in same scene)
  • several smooth tracking shots
    (e.g., slider / dolly / skateboard / car / bike / shopping cart )
  • Varied location- at least 3 separate locations/backgrounds
    (these can be rooms)
  • at least one shot you’re technically proud of
    (composition, lighting, movement, psychological effect)
  • NO SHOTS TAKEN IN “PORTRAIT MODE”
    They completely remove the audience from the narrative are thus, unusable.

Production Considerations

  • Get a tripod.  It's exhausting  to watch a film that's 100% hand-held. Consider the finished product, including intentional  "movement" that you'll generate in editing.
  • Consider deliberate camera movement.  Whip-pans, tilts, shaky camera, tracking shots camera moving purposefully- steady, shaky, pans, and tracking shots all have their own psychological feel.  The mark of an amateur is pointing at an action and shooting it.  A professional plans and composes how shots work together and convey emotion.
  • use the compositional rule of thirds

Post-Production Requirements

  • Ease your viewer in and out of your film: start and end on black
  • quick editing generates its own “motion” and less camera movement may be required
  • make seamless cuts in your "match-on-action" sequence(s)
  • Consider the interplay of rhythm/tone of your shots with your selected song.  Be sure the levels are appropriate and the music doesn't cut in or out too abruptly.

Due Dates: 

Nov 14: Preliminary Plan
Dec 5 : Shooting Finished & footage imported into iMovie
Dec 6: In-class editing time (80 minutes)
Dec  11: (by midnight): Everything finished & uploaded for class screening the next day 

Submission Requirements:
Handbrake your exported film to reduce file size using “Apple 720p30” preset.
Name film “lastname, Montage”.
Submit it through Dropbox before the day class begins on Dec 12.

Student Samples

Samples from Features

One-Shot Music Video:
The iMovie Re-cut

Goal:
Learn basic post-production skills in iMovie by adding visual energy, focus, and rhythm to a structurally simple single-shot clip. 

You're not changing the audio here, just showing your video editing prowess.

Extra goal: aesthetic pride. That is, be proud of what you do, trying to make the final product better than the original.

Basic Tools to use:

  • Start new Library, Event, and Project, import downloaded video from Dropbox link (above)
  • Scrub > spacebar to pause > Split clip (Command-B)
  • Probably good to learn to use (faux) beat markers 

    tutorial

Tools to use/try from the sidebar
Content Library

  • Title-over-image
  • Fade to black beginning/ending
  • Transitions
  • Edit > Connect cutaways 
  • Cut/move/repeat clips

Advanced Ideas to Play with:
Duplicate video to upper timeline

  • Play w/opacity/colorization between shots
  • Try a purposeful split screen
  • Try Picture-in-Picture

What to Avoid:

  • No videos besides what is in Dropbox.
  • No clips from outside the original video
  • Don't alter the soundtrack in any way (speed change, dropouts)

About repetition:
Not only is repetition/rhythm a key element of music that we like, it’s a key element to be aware of in good editing – but not slavishly. Most art is about setting up expectations (e.g., rhythm) and then messing with the expectation (e.g., change of rhythm).
https://youtu.be/1lo8EomDrwA


Submission Requirements:
Name film “lastname, One-Shot”
Submit it through Dropbox before  Oct, 31

Late films lose 10 pts per day late,
Maximum 70% point value after 3 days

(MTA Late Work Policy)

Sample: before/after

Voice-over Analysis Project:
Cinematic Techniques in Lola

First: Pick two conventions  

You're going to make two videos demonstrating  two cinematic techniques.  It will have voice-over (yours), a definition of the technique, and at least one clip to visualize the technique. So...

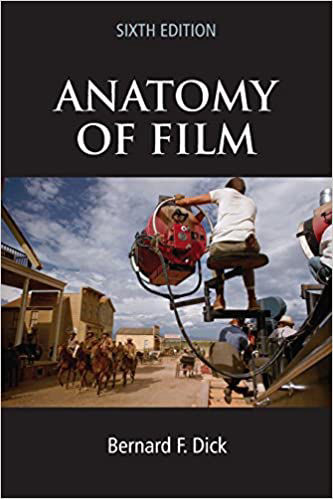
On the SignupGenius, you'll find a pretty extensive list of different camera or editing techniques used in modern cinema. Most of these are defined from the book Anatomy of Film, which we have in the classroom. You can also use a definition from a web search if you'd rather.

Click the link and sign up for TWO film conventions. You're going to make two short films in which you define a film convention and demonstrate its use in a clip from Run Lola Run. Additionally, you will find and demonstrate the convention used in another movie or piece of media

By screening your films in class, you will be teaching the class about your cinematic technique.

You should use class time on Wednesday, 10/1 to sign up for two conventions and begin work. The signup is here. 

Sign Up!

Next: Find your technique in Lola

Search through the film for when each technique is used. You'll need to demonstrate it visually in your instructional film. Use iMovie to grab the clip.

Your goal is to make a film similar to this:
  • Make 2 films- 1 per technique
  • each: 30 seconds-2 minutes long
  • Film stands alone with an “ease-in” and out – from black– for watchability.
    (fade in, fade out)
  • Name of technique appears first in "Standard Lower before other visual information.
  • The definition of the convention is accurate, appears in text on the screen, is clear and legible.
  • Voice-over narration is smooth and clean, audio normalized with clips
  • Your examples of the technique are accurate, appropriate and varied.
  • Examples come from more than one film.
  • Follows established naming convention: (lastname, techniquename)
  • Handbraked to 720p****if the application is available to us by submission time
  • Turned in on time through Dropbox

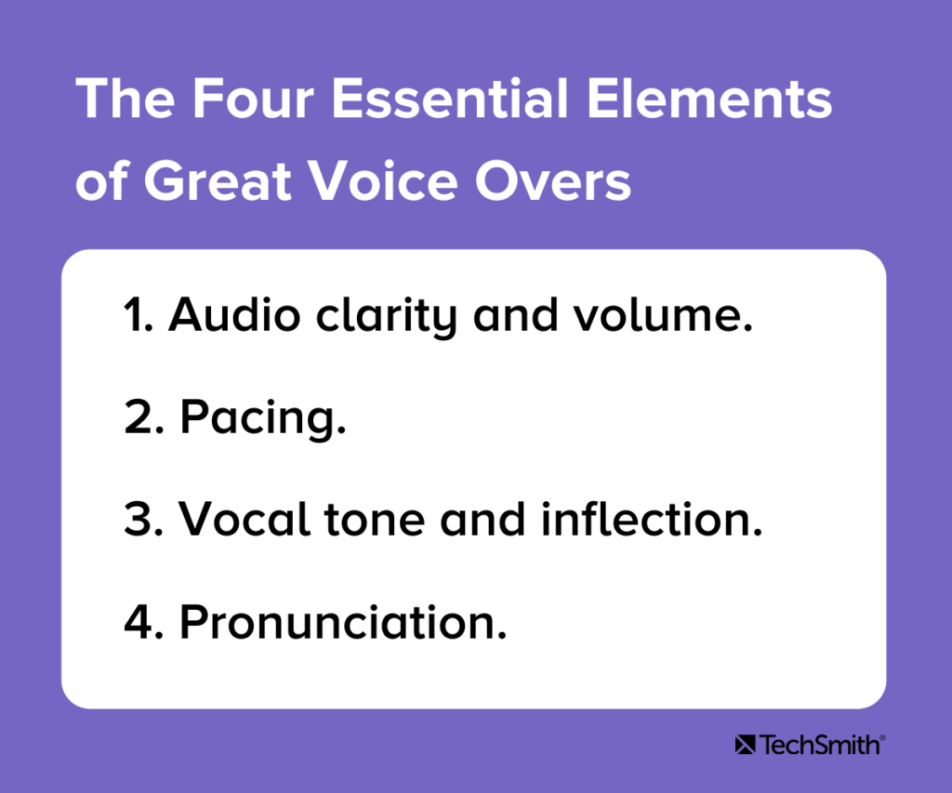
Now: Write your script and record your voice-over 

You can use Quicktime, iMove, Garageband or a 3rd party voice recording app that you're comfortable with. We're not asking for sophisticated microphones, but the tips on this page are pretty good and can help you get good, clean audio.


You can use a QuickTime "Screen Recording" to snatch a video clip for your project from YouTube (this is educational fair use).

File--> New Screen Recording --> Record.

Due Dates: 


Oct 4 : Sign up for and define 2 conventions
Oct. 15: Editing completed & both films uploaded by midnight
Oct 16:  Screening day.  

Student Sample Projects 

All deadlines are before the start of class on the date assigned. Projects submitted after class begins will be assigned a late penalty.

Late films lose 10 pts per day late,
Maximum 70% point value after 3 days
(MTA Late Work Policy)

Screen Direction & Continuity Editing Exercise

Most student films are too spontaneous- maybe the shots last too long and get boring, maybe the jump cuts are distracting, maybe the spontaneity makes it feel like a home video more than a produced film.  Let's practice planning for the finished film.

The Job: Make a 20-30 second film that shows a character moving from one place to another with some action occurring.
(opening a door, tripping over a ball, shaking hands with another person- it doesn’t have to be art!) 

Planning & Shooting
Filmmakers plan shots meticulously before they shoot. This is called preproduction, and no fiction film can exist without it. Background distractions, continuity errors, shots that don’t cut together- all hallmarks of unplanned, amateur and bad films. You’ll need to storyboard at least one sequence of shots before you can begin filming.

Pre-Production Requirements


  •  At least one 5-10 shot sequence storyboarded with match-on-action editing intent.

Production Requirements

  • A useful and varied mix of shots – establishing, medium, close-up; static, moving; low angle, high angle;– think of all the things we looked at in Lola (who’s got a crane? a selfie stick!)
  • Framing/edits that follow the 180° rule and are aware of consistent lateral direction.
  • At least two “cut on motion,” sequences (maybe one of which is “walking (moving) through the camera”, maybe cut from one angle to a wider angle, or closer shot).
  • NO SHOTS TAKEN IN “PORTRAIT MODE”!

Post-Production Requirements


  • Give it some air – start and end with a few seconds of black.  Use visual and audio fades to fit your tone.
  • No diegetic sound - use a soundtrack and focus on the images.

Due Dates: 

Sept 18 : Storyboard(s) Due
Sept 20: Shooting Finished (upload screenshot of footage in iMovie)
Sept 24:  (by the start of class): Editing completed & uploaded by classtime 


Submission Requirements:
Handbrake your exported film to reduce file size using “Fast 720p30” preset
Name film “lastname, Here to There”
Submit it through Dropbox by midnight Sept. 24- for class screening.


Thoughts to Consider
This is an exercise, learning to think about how to shoot a sequence. It can turn into something aesthetically pleasing, interesting, and satisfying. Either is fine – no need to shoulder the burden of “art” unless you want to. Then again, if you want to be an auteur, it’s good to play with style.

When transferring your clips to iMovie, iMovie itself is pretty good at seeing into your phone or camera (using USB – see iMovie Essential Training, Chapter 1). Image Capture gives you more control, though.

Late films lose 10 pts per day late,
Maximum 70% point value after 3 days

(MTA Late Work Policy)

© Copyright 2024 mrprince.net - All Rights Reserved